REMOTE COLOR GRADING WORKFLOW
This guide will help you to prepare your project for color postproduction in my studio. I work exclusively in DaVinci Resolve.
➡️ CLEAN YOUR TIMELINE
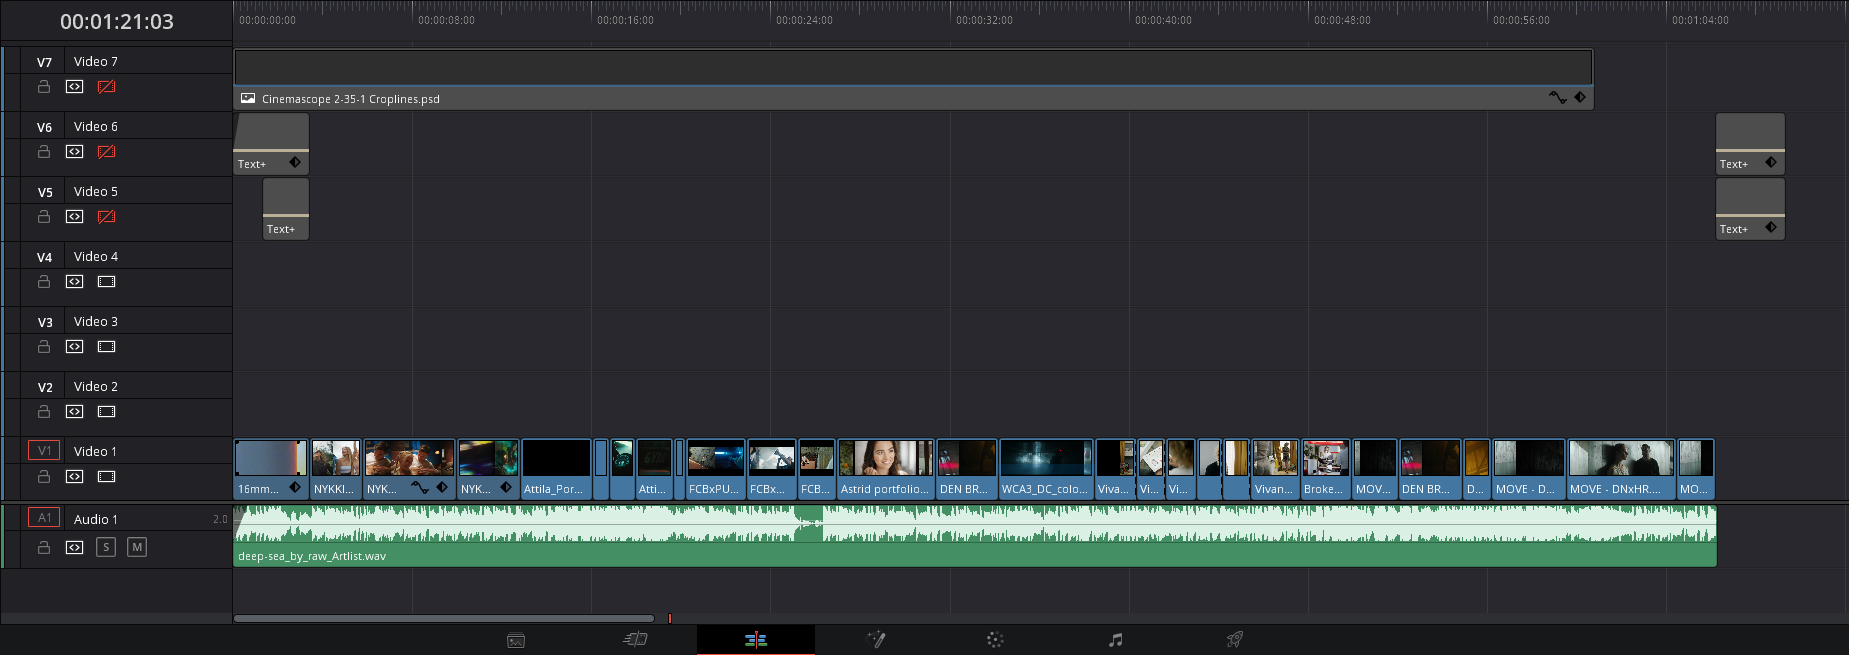
Before you export the project in one of the following ways, I need you to clean your timeline first. That means to delete all graphics, texts, and unused media from your timeline. Leave only used media. If you used LUT or made any color adjustments during the editing you have to turn it off. Also, if possible, put all your shots into one video track.
➡️ EXPORT YOUR PROJECT
There are more ways of delivering your project to my studio. I ranked them in order of my preference:
1) DAVINCI RESOLVE MEDIA MANAGEMENT
If your editor works in DaVinci Resolve (if not, go to the next chapter), you can easily send me your data through Media Management. DaVinci Resolve trims all the footage used in your timeline keeping their original format (even raw formats).
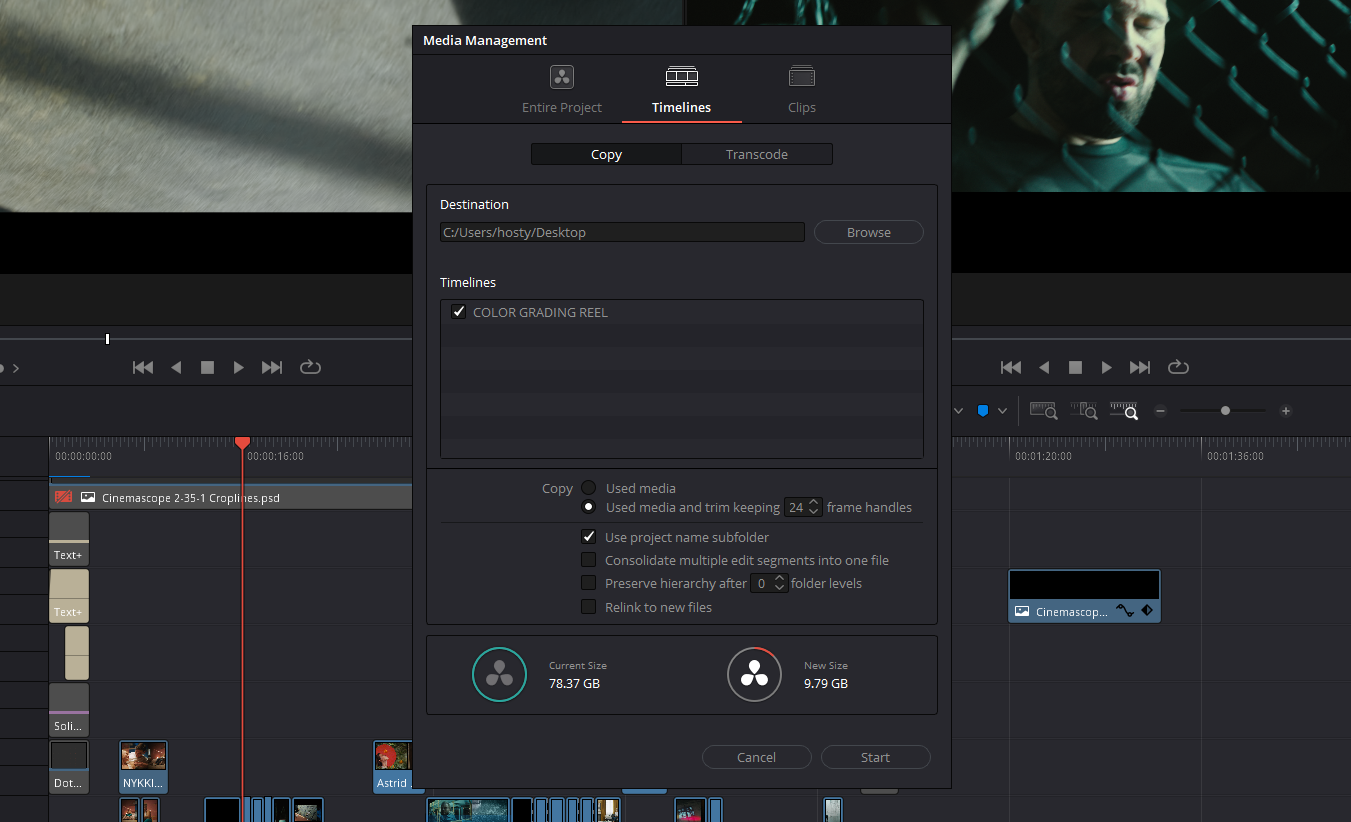
Open File > Media Management. In the Media Management turn to bookmark Timelines and keep the option Copy checked. Then you have to select the folder destination for copying the files. Select the final timeline you want to send me and then switch from Used media to Used media and trim keeping __ frame handles. Set the frame handles to 0 and click the button Start. DaVinci Resolve will copy all the footage used in the selected timeline and also generate .drt file (timeline file). Upload all the files you just exported to the Dropbox link I had sent you before.
You will send me:
Original footage used in your timeline
DRT file
Reference video file in lower quality
NOTE
You can set the frame handles to a number of your choice if you think they will be needed.
2) ORIGINAL FOOTAGE METHOD
The second option is to send me the original footage used in the video alongside an XML file of your timeline (or AAF file if you work in Avid). This option is a little bit tricky because the transfer from Final Cut or Premiere Pro to DaVinci Resolve is not seamless and there can occur problems with scaling, positioning, speed changes, etc. I also need you to send me a reference video file of your timeline for the error control.
You will send me:
Original footage used in your timeline
XML file (or AAF)
Reference video file in lower quality
📌 IMPORTANT
It is very important to clean the timeline before the XML export as mentioned above. Also, send me only the footage used in your final timeline, I don't need unused ones.
3) SINGLE FILE METHOD
With this method, you send me just a single video file in MXF OP1a (or QuickTime) format and Apple ProRes 4444 codec (DNxHR 444 is also possible) in native resolution. If you used some overlay layers you have to export it as a second video file with an alpha channel (transparent background). Don’t make any compromises. The highest quality possible is the key here.
I also need you to export an EDL file of your timeline. It saves me time because when I import the EDL file into DaVinci Resolve it transfers all the cuts you made.
You will send me:
Single video file in ProRes 4444
EDL file
📌 IMPORTANT
The video has to be without graphics, texts, animations, or color adjustments. If you used LUT during editing you have to turn it off.
PREMIERE PRO SETTINGS
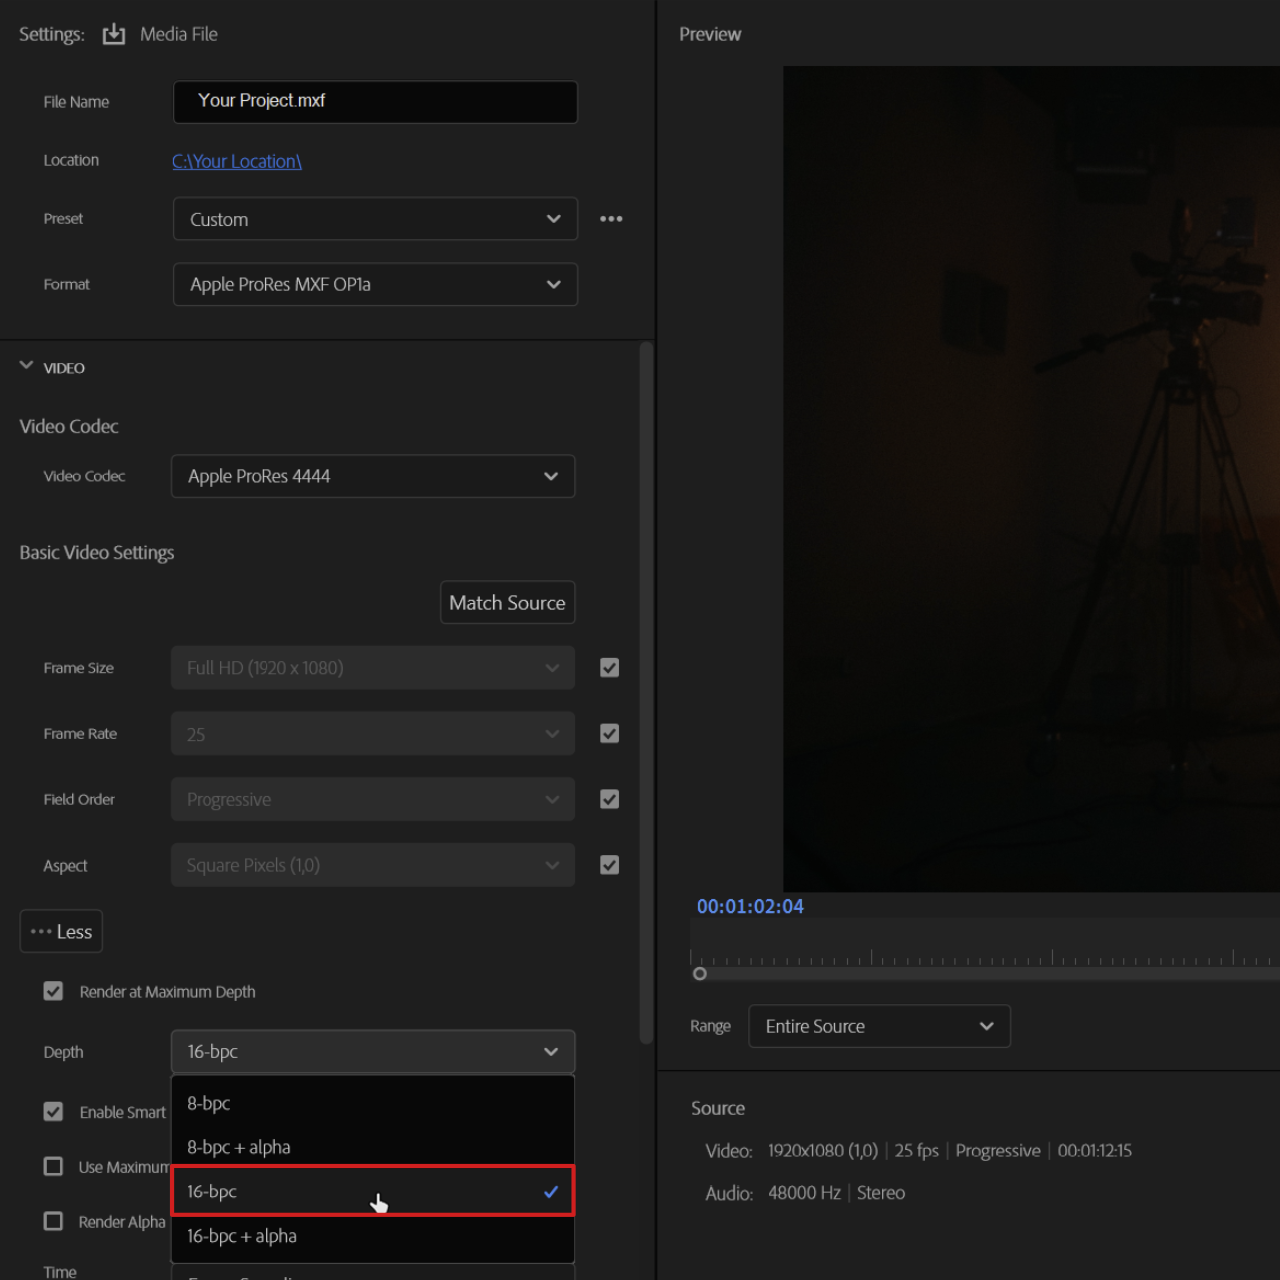
Premiere Pro settings for 3) Single file method. In the export menu choose Apple MXF OP1a (or QuickTime) format and select the Apple ProRes 4444 preset. In the detailed settings check Render at Maximum Depth and in the Depth section select 16-bpc option. As the last step check the option Use Maximum Render Quality. These settings ensure the highest video quality possible without artifacts and the default bit depth will be maintained.
➡️ SEND YOUR FILES
You can send me your project via any file transfer service you want (WeTransfer, MyAirBridge, Dropbox etc.). If you don’t use any of these services or the project is bigger than the free transfer quota you can upload your files into my Dropbox folder. My NAS storage automatically downloads everything you upload on Dropbox to my drives. It makes the transfer much faster and it saves me a lot of time. Total upload size is unlimited but there is 50GB size limit per file. Before you strat the upload put all your files into one folder named after the project.


